
Last Updated: November 10, 2026
Quick Summary
To minimise construction dust during home renovations, seal the work room with heavy plastic sheeting and a zipper door, tape every edge including the floor line, and keep the area under slight negative pressure with an exhaust fan venting outdoors. Capture dust at the source with on-tool extraction, a dust-rated HEPA vacuum and water suppression for silica-heavy cuts.
- Overlap barrier sheets by at least 200 mm and tape the full length of every seam.
- Hold a tissue near the entry flap to check the room is under negative pressure.
- Aim to turn over the work room's air four to five times per hour during dusty tasks.
- Use a true HEPA filter rated to capture particles down to 0.3 microns.
- Clean from the top down and wet, repeating over several days as dust settles.
Table of Contents
- Why Construction Dust Needs Controlling Before the First Cut
- How to Seal a Room from Construction Dust
- Dust Control at the Source: Cutting, Sanding and Demolition
- Choosing an Air Purifier for Construction Dust
- Dust Control During Kitchen Renovation: A Room-by-Room Plan
- How to Clean Construction Dust After Renovation
- Protecting Vulnerable Occupants and Your Belongings
- Request a Free Quote for a Dust-Controlled Joinery Installation
- Frequently Asked Questions
Why Construction Dust Needs Controlling Before the First Cut
Construction dust is the fine mix of plaster, timber, silica and paint particles released when you cut, sand or demolish inside a home. It travels further than most people expect, settling on surfaces rooms away from the work. At East Coast Joinery Solutions, we plan dust control before the first cut, because once fine dust is airborne, cleaning it up becomes far harder than stopping it. The Australian Government's guidance on silica dust explains why fine particles deserve serious respect.
What Is Actually in Renovation Dust?
Renovation dust is not one substance. It is a blend of whatever the renovation disturbs:
- Plaster and plasterboard dust from removed wallboard and sanded joints
- Timber dust from cutting studs, trims and cabinetry panels
- Silica particles from cutting engineered stone, tiles, concrete and brick
- Paint and coating flakes from older surfaces
- Insulation fibres from ceiling and wall cavities
Fine dust stays airborne for hours. It also settles into carpet, curtains and soft furnishings, where a dry sweep simply lifts it back up again.
Hazardous Dust Identification and Testing
Some dust is more than a nuisance. Silica dust from engineered stone, concrete and tile is a known health hazard, and older homes may contain lead paint or asbestos in sheeting and insulation. Before demolition, identify what you are cutting. A licensed assessor can test suspect materials. Never dry-cut engineered stone; use water suppression or on-tool extraction instead.
How to Seal a Room from Construction Dust
To seal a room from construction dust, you create a physical barrier between the work area and the living space, then manage airflow so dust stays on the work side.
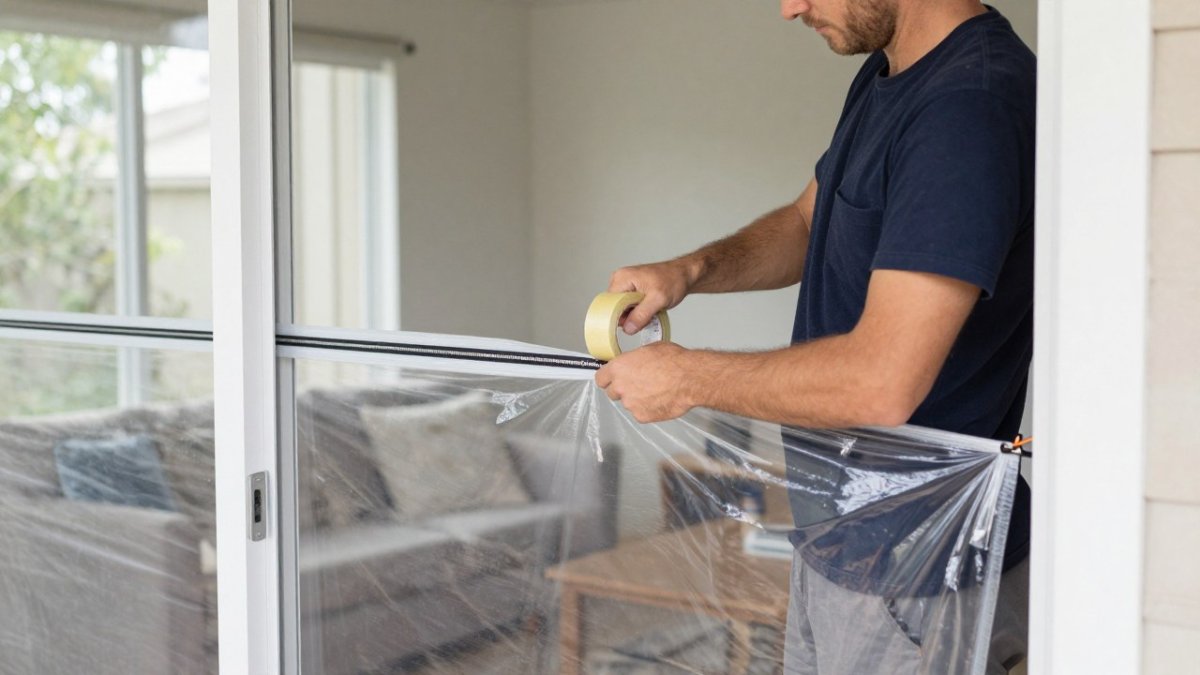
Start with heavy plastic sheeting and a zipper door. Tape every edge with masking tape, including the floor line. For builders managing this on larger jobs, our guide to professional cabinet installation for builders covers site prep and trades coordination.
Room-by-Room Containment and Pressure Setup
Containment works best when each zone is treated separately:
- Work room: full plastic barrier, sealed edges, extraction running
- Adjacent rooms: doorway barriers and closed doors
- Living areas: covers on furniture, sealed vents
- Hallways: a taped plastic corridor if traffic must pass
Air pressure matters. Keep the work area under slight negative pressure so air flows in, not out. A fan exhausting out a window, with the rest of the room sealed, achieves this.
A practical setup follows a repeatable sequence. First, clear the work room of anything you can move, then lay floor protection before any sheeting goes up, because dust will otherwise work under the plastic and scratch finished floors. Second, fix the barrier at the top first and work downwards, overlapping sheets by at least 200 mm and taping the full length of every seam. Third, seal the floor line with a weighted batten or a double run of tape; this is the edge most home setups miss, and it is where fine dust escapes into the rest of the house. Fourth, fit the zipper door so it opens away from the clean side, and add a second flap of plastic over the entry as a dust lock. Fifth, seal every penetration: socket outlets, light switches, air-conditioning vents, exhaust fans and the gap under the door. Sixth, place the exhaust fan so it draws air from the clean side of the barrier and pushes it outside, ideally through a window or duct, and run it continuously while work is underway.
Pressure is easy to check without instruments. Hold a strip of light plastic or a tissue near the entry flap; if it is drawn gently towards the work room, the setup is holding negative pressure.
For open-plan kitchens and living areas, build a temporary wall from timber studs and plastic rather than relying on a taped sheet alone.
Dust Control at the Source: Cutting, Sanding and Demolition
Source control beats cleanup every time. Capture dust where it is made, before it spreads. Three tools do most of the work: a dust extraction unit attached to your saw, a dust-rated vacuum with a HEPA filter, and water suppression for silica-heavy cuts.
A common mistake is using a standard shop vacuum without a HEPA filter. It collects chips but blows fine dust straight back into the room. Use a dust-rated unit instead. When sanding, attach extraction to the sander. When demolishing, mist surfaces lightly and remove material in sections rather than smashing it out.
Choosing an Air Purifier for Construction Dust
An air purifier for construction dust needs a true HEPA filter, sized correctly for the room. Fine renovation particles are small, and only a HEPA-grade filter captures them reliably. Place the unit inside the work area, not the living space, and run it continuously during work.
Sizing Filtration Equipment to the Room
Match the unit to the space, not the whole house.
A household purifier and on-tool extraction do different jobs, and confusing them is the most common mistake.
When comparing units, look for a true HEPA filter rated to capture particles down to 0.3 microns, and check the clean air delivery rate rather than the marketing room size. A practical target is to turn over the work room's air at least four to five times per hour during dusty tasks; a unit that cannot achieve that in your room volume will not keep up with cutting and sanding. Calculate the room volume in cubic metres (length × width × height), multiply by five, and compare that figure with the unit's rated airflow in cubic metres per hour. If the unit falls short, either add a second unit or rely more heavily on exhaust ventilation and source extraction.
Filter maintenance matters more during renovation than in normal household use. Pre-filters clog quickly with coarse plaster and timber dust, so check them daily during heavy work and replace or clean them as the manufacturer directs.
Watch out: a purifier placed in the living area rather than the work area will draw dust towards occupied rooms and give a false sense of protection.
For silica-heavy work such as cutting engineered stone, tiles or concrete, a room purifier is not a substitute for water suppression or on-tool extraction with a dust-rated vacuum.
Dust Control During Kitchen Renovation: A Room-by-Room Plan
Dust control during kitchen renovation follows a clear sequence. Kitchens sit at the centre of the home, so containment has to be planned before cabinetry comes out.
- Clear and cover: empty the kitchen, cover adjoining furniture, seal doorways.
- Isolate: fit plastic barriers and a zipper door at each entry point.
- Set airflow: run extraction and exhaust ventilation to hold negative pressure.
- Control at source: use extraction on every cut and sand.
- Clean daily: damp wipe and vacuum with a HEPA unit each day.
For homeowners budgeting for these measures, our guide on avoiding hidden kitchen renovation costs explains how to plan a contingency.
Dust control during a kitchen renovation follows a clear five-step sequence.
| Step | What to do |
|---|---|
| 1. Clear and cover | Empty the kitchen, cover adjoining furniture, seal doorways |
| 2. Isolate | Fit plastic barriers and a zipper door at each entry point |
| 3. Set airflow | Run extraction and exhaust ventilation to hold negative pressure |
| 4. Control at source | Use extraction on every cut and sand |
| 5. Clean daily | Damp wipe and vacuum with a HEPA unit each day |
How to Clean Construction Dust After Renovation
Clean construction dust after renovation from the top down, and clean it wet. Start at ceilings and light fittings, work down to skirting boards and floors, and use damp cloths rather than dry ones. Dry sweeping lifts fine dust back into the air. Vacuum soft furnishings with a HEPA unit, then damp wipe hard surfaces. Repeat over several days; dust settles again after the first clean.
A Measurable Inspection and Cleanup Checklist
Use this checklist before you sign off on the job:
- Ceilings, cornices and light fittings wiped clean
- Inside cupboards and drawers vacuumed and wiped
- Floors vacuumed with a HEPA unit, then damp mopped
- Soft furnishings vacuumed
- Air filters checked and replaced
- No visible dust on horizontal surfaces after 24 hours
For a detailed defect check on the finished cabinetry, see our guide on checking cabinet installation for defects.
Protecting Vulnerable Occupants and Your Belongings
Some people should not be in the home during dusty work. Pregnant women, young children, older residents and anyone with asthma or other breathing conditions face higher risk from fine dust (Dust storms). Plan for them to stay elsewhere during the dirtiest stages, or keep them well away from the work zone with sealed barriers.
Belongings need protection too. Cover furniture with plastic sheeting, bag soft furnishings, and move what you can out of the path of dust migration. Check with your insurer about cover during renovation; our guide on insuring a kitchen renovation and checking warranties sets out the covers to confirm before work starts. A mask with proper respiratory protection is essential for anyone entering the work area.
Request a Free Quote for a Dust-Controlled Joinery Installation
Dust control is a planning discipline, not an afterthought. The homes that stay clean are the ones where barriers, airflow and source extraction were set up before demolition began. If you are planning cabinetry work and want it installed without dust spreading through your home, East Coast Joinery Solutions can help. Before you request a quote, our guide on questions to ask before hiring a kitchen installer will help you vet any installer properly.
Get started with East Coast Joinery Solutions and keep your renovation clean from the first cut to the final fit-off.
Frequently Asked Questions
How do you minimise dust during a home renovation?
Start at the source: use dust extraction on tools, score and snap plasterboard rather than sawing it, and mist surfaces before demolition. Then contain the work area with plastic sheeting and a zipper door, and run a HEPA-filtered air cleaner or dust-rated vacuum throughout. Clean daily rather than waiting until the end, because fine construction dust settles on surfaces and gets walked back through the rest of the house.
Should you use an air purifier for construction dust?
Yes, provided it has a true HEPA filter rated to capture fine particles. Place it inside the work area if possible, or just outside the barrier in the occupied space, and run it continuously during work and for several hours afterwards. Change or clean the filter more often than normal, and never rely on a standard household purifier with a thin filter, as fine dust will clog it quickly and reduce performance.
How do you clean fine construction dust after renovations?
Work high to low: start with ceilings, light fittings and the tops of cupboards, then walls, then floors. Use damp wiping with a microfibre cloth rather than dry dusting, which just lifts particles back into the air. Vacuum with a HEPA or dust-rated machine, mop hard floors, and repeat the process over two or three days, because fine dust settles again after the first clean.
Can renovation dust affect indoor air quality in the rest of the house?
It can. Airborne particles travel through gaps under doors, through return air vents and along hallways, so a poorly sealed work area spreads dust well beyond the renovation. Sealing the room, switching off or covering return air vents near the work zone, and running filtration all reduce how far dust migrates. People with asthma or allergies are most affected, so plan containment before demolition begins.
